“Mostly Plants”*: 5 Food Books for Starting the New Year Right

oh-she-glows-cookbookI am obsessed with cookbooks.  When I first started to learn to cook for real (in my early twenties, just after I turned vegetarian), I would entertain myself for whole afternoons by going to the cooking section of a bookstore, sitting down on the floor (this was in the days before bookstores provided comfy reading chairs), and pulling a cookbook off the shelf to read it cover to cover.  Now that I have a regular income, I periodically break my budget (or fill my Christmas wish list) with a stack of cookbooks that I can pile next to me on the coffee table and read one after the other like novels.

Although I’ve been more or less vegetarian for the past 25 years (with exceptions made for fish and seafood because they made my life easier and, I believed, made me healthier), my diet has taken a sharp turn to the left recently.  I stumbled upon a string of documentaries, the most notable of them being Forks Over Knives and Vegucated, that convinced me of something I already half believed: I should try to eliminate all animal products from my diet.

So I’m starting 2015 with this tentative goal.  I’m not yet ready to demand that restaurants make my sag aloo without any ghee, or to carry a vegan bento to dinner parties in case my friends put eggs in their handmade pasta.  However, I’m having fun going through old cookbooks and buying (or demanding) new ones, and learning how to make cashew cream and multigrain chia power bread.  And the smoothies!  So many smoothies.  It’s a good time.

On my path to a whole-foods, plant-based diet, the food books below have been both helpful and enjoyable.  If you love a good cookbook, whether or not you want more plants and fewer animals in your diet, these books will give you hours of reading entertainment, an excuse to spend leisurely afternoons in the health-food store buying buckwheat groats and sorghum, and freezers full of healthy, tasty meals.  Which, when taken all together, is pretty much my definition of bliss.

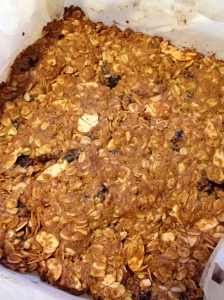
1. The Oh She Glows Cookbook (photo above): A friend introduced me to Angela Liddon’s blog at around the same time this vegan, allergy-friendly book was released.  It’s where I learned to make overnight oatmeal, and it inspired me to buy a vegetable spiralizer.  It’s also super pretty, especially the Canadian edition with the chia pudding fruit parfait on the cover!
thug-kitchen-cookbook2. Thug Kitchen: Caution: profanity.  Lots and lots of profanity.  My husband sent me the “trailer” for this book/blog because a) he couldn’t stop laughing, and b) he wanted to gauge, by my reaction, whether he should buy me the cookbook for Christmas.  And, because I said, “Holy &%$*,” he did.  It is great, and the blog is too.  Best recipe so far is the citrus tofu marinade, but I’m looking forward to trying the “Warm the F%*# Up Minestrone” next.
YU_Book_Main3. YumUniverse: This book is a wonderful compendium for someone embarking on what Heather Crosby calls a “plant-powerful, whole-food lifestyle.” As a bonus, all recipes are gluten free and most are made without soy.  The first chapter compiles research on why we should eat lots of plants and less of other things.  The second gives lots of good advice on filling your pantry and your kitchen tool cabinet.  The best part, though, is the pages dedicated to making staples like dairy-free milks (I have been avoiding buying these lately because they’re so full of preservatives), soaking and sprouting, storing vegetables, etc.
fok
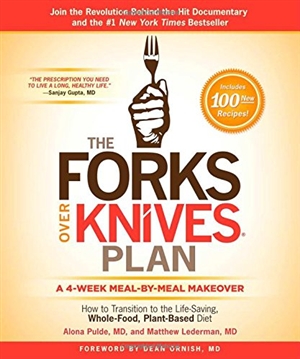
4. The Forks Over Knives Plan: The companion to the documentary mentioned above, this book details the research on the advantages of low-fat, whole-foods, plant-based diets entirely from a health perspective.  It then offers recipes and techniques (like how to saute without oil – it works!)  If you’re interested in the research behind plant-based eating, I would also recommend two books upon which this one is based: The China Study and Whole, both by T. Colin Campbell.  The China Study was a foundational text for the Forks Over Knives documentary, and gives excellent arguments for giving up all animal protein, as well as reducing added fat and salt, in order to ward off or even reverse chronic disease.
SS-b5. Salad Samurai: This was another Christmas gift, and I love it even though I haven’t yet made a thing out of it.  Just reading about Coconut Samosa Potato Salad and Tempeh Rubenesque Salad has made my life better.  Terry Hope Romero is one of the geniuses behind the classic vegan cookbook Veganomicon (with Isa Chandra Moscowitz, a vegan punk icon).  This book is not light on the fat – its subtitle includes the phrases “ultra-hearty” and “you don’t have to be a vegan to love” – but it is heavy on the veggies, legumes and grains, and is a gorgeous little handbook to making every salad a meal.

What food books have improved your year?  Do you have a favourite vegan or vegetarian collection?  Have you made any changes to your diet recently that you feel were for the better?  Let me know your thoughts.

*Note: post title from Michael Pollan’s Food Rules, another great food book not on this list.


Skillet Beans for Stephen Thompson: Best Recipe Ever

1mQUTnMy favourite podcast is NPR’s Pop Culture Happy Hour, wherein four smarty-pantses sit around and talk about movies, TV, books, music, theatre, and so on. They always end the podcast with a segment called “What’s Making Us Happy This Week,” and in the most recent show, one of the smarty-pantses, Stephen Thompson, said he is being made happy by his current project: he wants to learn to cook. He therefore wants listeners to send him recipes.

And so here, for Stephen Thompson, is the simplest version of my go-to, all-purpose, never-fail, child- and adult-pleasing recipe: skillet beans. It’s kind of like a chili. It’s better, though.

The original recipe for these skillet beans can be found in the Moosewood Restaurant New Classics cookbook, which is an excellent cookbook, but not necessarily suitable for absolute beginners. I’ve adapted the recipe over the years to make it my own, and now I gussy it up with all sorts of different vegetables and spices, but this simple version is the base for all of them.

Ingredients:

  • 1 tablespoon vegetable oil
  • 1 small onion, chopped
  • 1 clove garlic, minced fine (only onion or only garlic is also ok)
  • 1 carrot, chopped
  • 1 red pepper, chopped
  • 1 tablespoon ground cumin
  • a tiny smidge of adobo sauce from a can of chipotles (this really makes the recipe. Adjust amount according to your and your children’s heat tolerance, but START SMALL)
  • 1 1/2 to 2 bottles of good-quality mild salsa (organic if possible. Green, red or both. Use the amount you need to get a consistency you like)
  • 2 cans of black, pinto or kidney beans (or a combination), drained
  • 1 cup frozen corn
  • salt to taste

Instructions:

1. Heat the oil on medium heat in a large pot.
2. Reduce the heat to medium-low. Saute the onion in the oil until translucent. Add a pinch of salt.
3. Add the garlic and stir for about 30 seconds.
4. Throw in the carrot and peppers, and another pinch of salt. Saute until the peppers are just losing their crispness.
5. Add the cumin and the bit of adobo and fry for just a minute, stirring, to toast the cumin.
6. Add the salsa, stir, and bring up to a simmer; then add the beans, return to a simmer, and let continue to simmer for at least 30 minutes, adding a bit of water or more salsa if it gets too thick.
7. At least five minutes before serving, add the corn and return to a simmer until the corn is warmed through. Add more salt if necessary.
8. Serve with rice if you want. Put sour cream, cheese, guacamole, cilantro or whatever else you like on top.

Note: the absolute best blend of spices for this recipe is as follows: 1 tablespoon cumin seed, 1 tsp coriander seed, 1 tsp fennel seed, and 1 tsp thyme, ground up in a mortar or a spice grinder. However, novice cooks should not be prevented from trying a recipe because they have to fiddle with whole spice seeds and grinders, so try this version first.

Image by Miguel Saavedra

Growing Lettuce, Bok Choy and Scallions in February: Step 1

Can I grow lettuce, bok choy and green onions from kitchen scraps?

scrap sproutingYesterday, we went to the hardware store and bought seed starting mix, grow lights, and other paraphernalia for the first stages of our new garden.  I planted my onion seeds in leftover takeout trays, as well as a little pot of catnip for the days when Cat A and Cat B are good boys (assuming that happens.  Someday.)

However, this is insufficient.  The onions will take forever.  I can’t eat the catnip.  (Well, I probably could, but I’d rather not.)  I want to be really growing things.  Showering the mandevilla and turning the Norfolk pine every few days are fine tasks, but I want to grow something I can eat.

This post about growing vegetables from kitchen scraps has been making the rounds.  I have a sunny kitchen window.  I also have re-subscribed to a local CSA, so this week I received some local organic lettuce and bok choy, and I had scallions in the fridge.

So I’ve cleaned the lettuce, stir-fried the bok choy and scallions, and made myself a little windowside garden to tide me over until the spring.  Let’s see what happens!

Breakfast Bars and Okonomiyaki

Yesterday I had big plans to go out and do errands.  This included a large haul of groceries, to help me prepare freezer meals for an upcoming 2-week contract grading public exams.  However, the aftermath of Thursday’s record-breaking snowfall meant getting out my front gate was going to be a challenge, much less walking the 10 blocks to the grocery store.  A friend tipped me off that I could order from said grocery store online – what??  Hourrah for the 21st century! – and this freed me to spend the day indoors, drinking too much coffee and cooking with what I already had.

I needed to solve two problems.

1. I’m enjoying sleeping in and am not looking forward to returning to an early rise next week.  Also, as I’ve mentioned, I’m sick of my standard work-a-day breakfast and need something new.

2. I sprouted too many mung beans.

To tackle the first problem, I decided to take on a recipe I’ve been looking forward to: the almond date breakfast bars from my new favourite cookbook.  I reasoned that “breakfast bars” amount to “no need to eat breakfast BEFORE you leave the house; thus, an extra half-hour in bed.”

I didn't have dried dates, so I used fresh and tossed them with a bit of the flour to keep them from sticking together.

I didn’t have dried dates, so I used fresh and tossed them with a bit of the flour to keep them from sticking together.

IMG_0615 IMG_0631

IMG_0666

If you like to bake, you need to get your hands on this book. These are fantastic: crunchy, sweet but not too, with a nice touch of salt and richness.  I can’t WAIT to sleep in until 6:30 a.m. on my first day back at work, and then pull an almondy datey bar out of the freezer and tote it with me, to be enjoyed with a thermos full of hot milky coffee at my desk, as I gear myself up for stacks of essays on Raymond Carver and Ann Hui.

The answer to Problem #2 – the surplus of mung bean sprouts – is okonomiyaki.

I haven’t made okonomiyaki in many years – maybe only once or twice since I returned home from Japan in 1998.  “Okonomiyaki” literally means “everything you like all fried up together.”  It’s a traditional Japanese pancake, usually consisting of cabbage and other thinly sliced veggies, and maybe some ground pork, bound together with eggs and flour and topped with savoury sauces.  The Japanese I knew often referred to it as “Japanese pizza.”  This baffled me: it bears no resemblance to pizza except for its round shape, and Japan has plenty of real pizza, often rendered extremely “Japanese” by toppings of seaweed, bonito flakes and Kewpie mayonnaise.

I had no cabbage (nor scallions, which would have added something), but I figured the mung bean sprouts would be my main component.  I also had a handful of romaine and arugula that really needed to be used, and some carrots.

IMG_0623 IMG_0621When I left Japan, a friend and colleague gave me a beginners’ cookbook on traditional Japanese dishes that has proved an invaluable basis for improvisation.  So I made up my recipe with this cookbook as a guide, but adjusted things to suit my pantry and tastes.

I sifted 1 cup whole wheat pastry flour, 1 cup all-purpose flour, 1 tsp baking powder, and a good dash of salt into a big bowl.  I slowly whisked in about 1 1/2 cups of vegetable broth (you could easily use water) until the batter was the consistency of thickish crepe batter, but not completely smooth (you don’t want to overmix.)

IMG_0635Then I covered the bowl with a plate and let it stand for 30 minutes.

I tried the mung bean sprouts in a salad a few days ago.  Raw, they were too beany for me.  I preferred them cooked in a curry the next day, so for the pancakes, I decided that cooking them first would be better.  I sauteed them in peanut oil, and tossed the shredded carrot and salad leaves in at the last minute, just long enough to wilt the lettuce.

IMG_0641

I dumped the veggies into a bowl and cleaned out the pan.  I beat the egg.  When the batter had finished resting, I stirred the egg into it gently with the whisk.  The batter had thickened a lot, so I added a bit of water.

I reheated the pan, oiled it, and spread a thin layer of veggies in the bottom, then spooned a couple of ladlefuls of batter over them.

Mmmmmm.  Appetizing.

Mmmmmm. Appetizing.

After about 4 minutes, when the edges started to detach and the centre started to firm up, I carefully turned the pancake over.

IMG_0647The batter still seemed unnecessarily thick, so I added a bit more water before making the second pancake.  As is always the case with pancakes and crepes, the second one cooked up much better than the first.

I topped them with hoisin and homemade sweet chili garlic sauce.

IMG_0656The verdict: mine (the first out of the pan) was gluey, but Husband declared his delicious.  Tonight I will thin the leftovers a bit with water and maybe a second egg.  In the future, I will use less whole wheat flour.  And no mung bean sprouts.  Home sprouted mung beans are, I have decided, out.

Nevertheless, I’m happy to be doing something Japanese-like again – I miss Japanese food, but at home I don’t have to impress anyone with authenticity.

And now I need to go try one of those breakfast bars.  I will report back.

Christmas Cooking, Final Leg: Squash Ravioli With Sage Brown Butter

Update on the imperfect Christmas Eve quiche: it was a hit!  It drew comments like “This is the best quiche I’ve ever eaten” and “Did you go to cooking school?” So despite the pastry hiccup, I won’t be tossing out my standard quiche formula.

Christmas morning was lovely, and I now have a stack of new non-school related books to read.

IMG_0479I’m already halfway through Sheila Heti’s How Should a Person Be? and it’s knocking my socks off.

I haven’t made stuffed pasta in a while.  Before we’d made a habit of going out for dinner on Christmas, or spending Christmas Day with my father’s family, we had a “stuffed pasta” Christmas tradition.  This began on our second Christmas together, when we took a trip to New York and stayed at the apartment of some friends who were away. I didn’t feel like seeking out specific ingredients in unfamiliar grocery stores, or spending a lot of time cooking in an unfamiliar kitchen.  We went to Whole Foods (or was it Zabar’s? Can’t remember…) and scrounged around for something easy and delicious, and came across some fresh-made pumpkin-stuffed ravioli.  I don’t think either of us had ever eaten pumpkin ravioli.  It sounded amazing, and, doused in a packet of fresh-made roasted-red-pepper sauce, it was.

Our next Christmas, I tried making squash-stuffed ravioli myself.  I invented the filling recipe on the fly, and it turned out much too sweet and didn’t work at all with the bottle of pesto we dumped on it.  I gave up. For a few years, we just bought stuffed pasta at the supermarket so I didn’t have to bother with cooking on Christmas.

This year, though, I was determined that we would have a real home-cooked Christmas dinner that I would make from start to finish in our new kitchen.

I should have photo-documented the process of making the squash ravioli, but I was too absorbed in what I was doing to bother with taking pictures.  I had made the filling a few days before with chopped pecans, chopped sage and puree of roasted butternut squash. (The recipe I was sort of following called for maple syrup, but I had learned my too-sweet lesson.)

Yesterday I made the pasta, by tweaking a recipe that came with my KitchenAid pasta rollers. Their “light wheat pasta” recipe calls for 2 1/2 cups of whole wheat flour, one cup of white flour, 4 eggs, a couple of tablespoons of water and 1/2 tsp of salt.  I reversed the proportions of white and whole wheat, as the ww flour I used was a coarse integral bread flour and I didn’t want the pasta to be too heavy.

I tried to shape the pasta by following these instructions from Apartment Therapy’s The Kitchn, but I couldn’t get the technique; the squash stuffing kept spilling out the sides of the ravioli.  I finally made it work by applying dabs of stuffing instead of a line, but I’m going to try this method again and see if I can master it, because the agnoletti in the pictures look so pretty.

Our lovely friend arrived at around 4, bearing TOO MANY COOKIES, (mmmmm, just had some for breakfast…), toys for the cats (Cat A was having an off day, so it was helpful to have something to entertain him), and wine.  We started with the mushroom soup that I made on Friday – it was declared a winner – and when that was done, I simmered the ravioli and made the sage brown butter.

I melted about 1/3 cup of unsalted butter with a dash of truffle oil in a pot, and then threw in a big pinch of fleur de sel and a handful of chopped sage leaves. The sage crisped up nicely, but the milk solids browned in the butter while the liquid didn’t brown sufficiently.  I’m not sure why that would be, but I threw it all together in the pasta pot anyway and slapped it on the plates.

It was, if I may say so, completely delectable.  The pasta was just firm enough, the filling was savoury and sweet but not too sweet, and the butter sauce had a lovely rich truffle-and-sage flavour.

Yes, it's a bit blurry - a lot of wine had already been consumed.

Yes, it’s a bit blurry – a lot of wine had already been consumed.

IMG_0475Christmas tradition reclaimed!  I see no reason not to make this dish every year, especially as I’m rarely up for the time-consuming process of making my own pasta at any other time.

We had a lovely evening full of wine and chat.  I’m happy to report that although Cat A continued to seem out of sorts, he appears much better this morning and has been chasing his new toys all around the house.  And, special bonus – it looks like the lipstick plant is starting to bloom!

IMG_0478Happy holidays to all of you.  I hope your December 25, however you chose to celebrate it or just live it quietly, was as pleasant and love-filled as ours.

How to Make an Imperfect Quiche

My favourite potluck contribution is a quiche.  It’s a standard recipe that can be adapted to many fillings, it’s fancy enough to be impressive and simple enough for anyone to make, it’s delicious, and we never eat it at home unless we have company.  We’ve been invited to a collaborative dinner party for Christmas Eve, hosted at the house of some dear, harried toddler-parents, so I’ve offered to bring the main dish: quiche.

I learned to make quiche about 20 years ago from the cookbook The Vegetarian Epicure.  This book also taught me to make tomato sauce and other indispensibles, but the best thing about the book was that for years I had no counter space upon which to roll out pastry, and the Pastry Brisee recipe requires no rolling.  It makes a very crumbly dough that you press into the pan, making a rich, shortbread-like crust.

It’s a simple recipe involving a cup of flour, a dash of salt and sugar, and 2/3 cup of butter.  It instructs you to sift the dry ingredients and then work in the butter with your fingers, but I’ve watched enough Food Network to know that the very best way to make pastry dough is in the food processor, where your hands won’t melt the butter.

IMG_0407 IMG_0413That’s it – no water added.  The recipe calls for pressing the dough into a ball, but I’ve always found this impossible, so I just dump it into some form of sandwich bag, roll it into a ball-like shape and put it in the fridge for a while.

IMG_0418Then you press it into the pan, being careful to make it even all over, especially in the middle and the corners, where it can sometimes be too thick.  You bake it blind at 450 for 10 minutes.

IMG_0431You will notice that the texture of this pie crust is much too lumpy-buttery.  I decided to ignore this as, hey, the characteristic of a good crust is that it’s flaky, and butter lumps make more flakes.  Once the blind baking was done, I realized my mistake.

IMG_0435The pastry has essentially melted.  I recognize this problem from my early days of learning to make shortbread – I seem to have mismeasured the butter and not fully incorporated it.  Also, the crust is overcooked.  I’ve suspected for a while now that my oven is running hot.  I need to buy an oven thermometer.

No matter.  This quiche will be more of a fritatta with a pastry bottom.  It will be fine.

Next: caramelizing the onions.  Cook them on lowish heat for a long time, and don’t stir too much.  This is important so that they will brown.  However, they should perhaps not be this brown.

IMG_0437It’s ok!  Crisp brown onions are tasty!  This quiche is going to be fine!

Take the onions off the heat and throw a bit of salt on them.  Then fry up the mushrooms, salt them, and throw some spinach in at the end to wilt it and cook the moisture off.  Scoop them out with a slotted spoon to leave the excess liquid behind.

I’ve found it helps to cool everything down before assembling the quiche, so I pop the pastry and veggies into the fridge for the moment.  I also set the oven for 375 (quote, unquote) in hopes that this is close to the 450 that is needed to start the quiche.

The basic recipe for any quiche filling is some cheese, 4 eggs, and a cup of milk (or cream if you really want to fatten it up).  I’m using soy milk because my husband isn’t so good with lactose, and goat cheese for the same reason, and also for the reason that goat cheese is delicious and goes well with spinach and mushrooms.

Important quiche secret: put the cheese at the bottom.  It’ll form a barrier between the liquid and the pastry so the pastry stays crisp (although the state of my pastry might be moot at this point.)

IMG_0445Then pile on the veggies, starting with the oiliest (the caramelized onions).  Be sure to leave as much liquid as you can behind so it won’t sog everything up. (You could even strain the liquid into a separate bowl and add it to the eggs when you whip them – as long as the liquid is not still hot – but this might make your custard a weird muddy colour.)

IMG_0447Whip together the eggs and milk, a big pinch of salt, some pepper, and some herb if you have some on hand (dill!)  Pour this custard on top of the veggies.  It might look like it doesn’t cover everything, but it will probably expand to real quichiness in the oven.  (Fingers crossed.)

IMG_0451Bake at initial, higher temperature for about 15 minutes, and then turn the oven down (I turned it to 325 – we’ll see…) for 10 or 15 or 20 or 25 more – keep an eye on it.  It’s done when the center is just firm – overcooked quiche is not good, and it will continue to cook a bit when it’s out of the oven, so if there are little dots of slightly runny egg here and there, it’s ok.

IMG_0464Looking good! I can’t cut into this and taste it now (one disadvantage of bringing a pie to a party), but I’ll report on its success, or not, in the morning.  In the meantime, I suppose it’s time for me to learn to roll out pastry dough so I can avoid melted shortcrust in the future.  And if anyone wants to give me an oven thermometer for Christmas…

Christmas Cooking: Part 1: Mushroom Soup

Tonight I did something that I do far too often: I bailed on a party.

I really didn’t WANT to bail this time.  It was being hosted by a good friend from work, and her Christmas parties are a lot of fun, and it started early, which is important to me, as I am no longer a stay-out-until-the-sun-comes-up kind of lady.  However, regardless of all today’s assurances that this is NOT the apocalypse, you wouldn’t have known it looking out my front door.  It was pouring rain, the wind was gusting, the temperature was dropping, and we were supposed to get snowy sleety rain later.  The trip from my house to my friend’s house is an hour-long journey that includes bus, metro and walking, and I couldn’t bring myself to do it.

But I didn’t feel good about it.  I felt like a loser for being such a coward in the face of a little (freezing, blowing) rain.  So what is the best thing to do when you’ve bowed out of something and don’t feel good about yourself as a result?  Get busy doing something you are obligated to do that doesn’t involve braving the weather.

So I decided to get a jump-start on the holiday cooking by making the mushroom soup for our Christmas dinner.

For the past couple of years, we’ve gone out for dinner on Christmas Day.  I find Christmas a bit lonely.  My father lived in Montreal until two years ago, and so we usually had Christmas dinner with him and his family.  They’ve moved on to northern-er pastures, however, and my mother also lives far away, and so on Christmas it’s just my husband and me and the cats.  This makes me a little sad.

So for the past two years we’ve had Christmas dinner at our favourite Ethiopian restaurant.  It’s been great: quiet but warm, with plenty of other non-holiday-observant types dropping lentils and injera on themselves. A trip out of the house so I don’t feel cooped up, and lots of heavy food to keep my husband happy.

However, this year, we own a house.  There’s something much more Christmassy about making Christmas dinner if you’re making it in your own house.  So I proclaimed myself game, and I think my husband was a bit relieved that we wouldn’t be trekking halfway across town, even for yemesser watt and gommen.

We’ve invited a friend to join us, so that will make it much more festive.  The plan is to break out the stand mixer and pasta attachments and whip up some ravioli. And as a starter, mushroom soup.

I was planning to buy mushrooms on Monday; I didn’t anticipate needing a self-affirming activity tonight. I’m therefore going to make the soup with the two bags of dried shiitake in my pantry.  I’ve never made a soup of only dried mushrooms before, so we’ll see how this goes.  Fortunately, I picked up some fresh dill at the supermarket when I did my massive pre-holiday grocery haul today.

IMG_0339I will loosely base my recipe on this one from Smitten Kitchen, because, well, why not.  Sure, I don’t have fresh mushrooms, and I don’t want grains in my soup, and I don’t see the need for tomato paste, and I’ll be adding dill when no dill is called for.  Which is to say, I just printed up this recipe as if I were going to make use of it, but basically I’m just doing what you do when you make soup: sauteing some vegetables, adding some broth and flavourings and other stuff, and letting the soup… soup itself up.

(This is also a good time to get a head start on the butternut squash for the ravioli.)

IMG_0342So first, the mushrooms must soak.  They sit in a bowl of hot water for a half hour or more, with a little plate on top to hold them under.  When they’re done, you have a bowl of nice fat juicy mushrooms and some delicious mushroomy broth.

IMG_0346Then you remove the mushrooms – keep the soaking water to add to the soup – and rinse and slice them.  Remove the stems, which are tough, and add them to the stock bag in the freezer to impart the rest of their mushroomy flavour next time you make stock.

Chop an onion and a couple of carrots and saute them for 10 minutes or so.  Add two cloves of chopped garlic. I also chopped the dill stems and threw them in here, saving the fronds for later in the process. (You could add some dried dill here as well.) Toss in the sliced mushrooms.  Add a teaspoon or so of salt for now.  Then pour a bit of sherry over it all if you like.

IMG_0356Add the mushroom soaking water very carefully – don’t disturb or add the sediment at the bottom of the soaking bowl.  It’s mushroom dirt.  Throw it away.  Add more stock or water to the soup if you need it, depending on how thin you want it (you may need to add more as it simmers.)  (I added a couple of cups of the Mock Chicken Stock I made a couple of days ago.)

Let it simmer away for as long as you like, at least 20 minutes or so unless you like very firm veggies.  Taste the carrots occasionally to see if they are as soft or firm as you want them.  Salt as necessary.  I threw in the dill fronds about halfway through, as well as some Bragg’s to add depth and salt, and some pepper near the end.  And at the very end, some acid – I like sherry vinegar with mushrooms, but apple cider or white wine vinegar would work, as would a dash of lemon.

Steamy!

Steamy!

Any soup that’s made ahead will need more salt, pepper and acid at serving time.  You’ll also need to add more fresh dill so the herb will be nice and green and punchy.

You could totally add barley or farro or rice or whatever grain you like to this at the beginning, and you could start with a roux and throw in some cream if you wanted a creamy soup.  I’m hoping this will make a nice light starter for a heavy pasta meal, so none of that will be necessary.

IMG_0363

I’m still a little sad that I didn’t make the (Herculean) effort to pull on my galoshes and trek across town to my friend’s party.  Nevertheless, having a pot of Christmas soup to show for it makes me less of a loser, I think.

Tomorrow will likely involve cookies and pasta filling.  Christmas dinner at home is starting to look almost as good as yemesser watt.

Sprouts!

The wheat berries have sprouted!

wheatsproutsI put them in a salad with some chick peas, carrots and red onion, as well as the leftover citrus vinaigrette from the other day.

IMG_0322They have a chewy, slightly crisp texture and a green, fresh taste, kind of raw on the tongue, but pleasant!  They offset the rich chick peas nicely.  The vinaigrette, with its touch of spice, works very well with them.  The whole thing is filling and feels clean and energizing – your body will thank you all afternoon, until you stop in the midst of goddamn Christmas shopping and eat a cookie.

Next: mung bean sprouts.

IMG_0317Sprouting instructions here.

I grew sprouts!

Risotto. Therefore, Mock Chicken Stock.

Today I made risotto.  It’s been a while.

Risotto is a staple (yawn) vegetarian option at company dinners, holiday meals, etc.  Don’t get me wrong – I love a good risotto – but it’s not a great vegetarian main dish.

First off, you can’t be sure it hasn’t been made with chicken stock.  Ask.  Even if it hasn’t, it isn’t technically vegetarian, if you want to be picky about it, because it has parmesan in it, and unless your restaurant has a line on certified rennet-free vegetarian parmesan – well, it isn’t.  Also, nutritionally speaking, risotto is the fancy-pants labour-intensive Italian equivalent of mashed potatoes – a bowl full of refined starch, with some mushrooms or pumpkin thrown in if you’re lucky, and usually without a protein in sight besides the aforementioned cheese.  (Yes, I know some risottos include beans, but it isn’t a texture that appeals to me.  You can sprinkle in some nuts – delicious! – but the calorie-to-protein ratio is…you see where I’m going.)

Nonetheless.  The weather outside is frightful.  Therefore: risotto.

frightful

I had no vegetable stock on hand, and, in any case, I tend to make stocks that are rich and meaty in taste, full of soy sauce and coriander and even lentils.  Risotto calls for something lighter, so I found this Mock Chicken Stock recipe.  I had no carrots, celery, fresh garlic or parsley in the house.  However, I had all the right spices, a squeeze-tube of roasted garlic paste, and a bag full of leek and herb trimmings that I keep in the freezer for just such an occasion.  Also, a red onion, and I threw in a handful of nutritional yeast because it gives stocks a nice savoury taste and chickeny colour.

stock

(Note to self: be more conscientious about filling the veggie trimmings bag every time you peel anything.  Better yet, keep two, one for “light stock” and one for “rich stock.”)

I bought a slow cooker a few years ago, and have found that the only things it really helps me with are large batches of dried beans, and vegetable stock.  Anything else – stews, puddings, etc. – is better cooked over direct heat in a pot on the stove, but for stock, the slow cooker is ideal: throw everything in, cover it with lots of water, and walk away for 8 hours or so.

My go-to risotto recipe is the Risotto Milanese from Moosewood Restaurant’s New Classics.  In fact, this is my go-to cookbook for a lot of things, including the Lemony Baked Tofu that I happen to have left over in the fridge and that I will reheat in some stock to provide our missing protein.  Both the risotto and the tofu recipes can be fiddled with, making them excellent bases for improvisation.  When I made the tofu yesterday, for example, I threw in some shallot oil and sweet garlic chili sauce, products of an experiment with Burmese soup and condiments on the weekend.  I don’t know if this will make it weird with the risotto.  Who cares?  Not me.

Despite the gory weather, I made it to the fruiterie while the stock was stocking.  They had no saffron; I hoped the turmeric in the stock would make up for that, at least where the colour was concerned.  I also bought mushrooms and a red pepper so that my risotto would be something more than cheesy rice porridge, and some arugula and romaine for a salad.

salad

The stock turned out very chickeny!  A bit cloudier than I’d like, but golden and tasty.

strainedstockWhat’s the best thing about making risotto?  It’s a very good reason to pour yourself a glass of white wine at 4 p.m., because hey, you have to open the bottle anyhow.

wine First step: fry up the mushrooms and peppers and set them aside, to stir in at the end.

mushpepp

Then: saute the onions in olive oil and butter.  I probably should have used a different pot, but why waste all that good mushroom flavour, even if the risotto ends up looking a bit muddy?  This isn’t Top Chef Masters here.

onionsauteThen, the rice.  If I were really good at this, I’d use carnaroli, but arborio is all I’ve ever had.  Toss it in the buttery oily onions until it’s all coated.  Then throw in a cup or two of white wine.  (Think carefully about how much you need to save for drinking with dinner.)  Stir and cook until the wine is all absorbed.

riceStart adding the stock, which should be warm, a ladleful at a time.  Stir a lot, and wait until one ladleful is absorbed before you add the next.  Keep doing this until the rice is tender but still a tiny bit firm.

I used to make my risotto so thick and gluey that you could stand a lazy cat up in it, because it felt more like a real meal that way.  However, I’ve been informed over and over that this is wrong.  (In one agonizing moment on The Next Food Network Star, Wolfgang Puck took a bite of someone’s risotto, stood up from the table, took the contestant by the hand, led her back to the kitchen, and taught her to do it properly.  I do not want Wolfgang Puck to ever do this to me, so I will endeavour to do as he says.)  The risotto should be a little bit soupy and loose, and it makes sense to have enough stock ready so that, even once you think it’s all done, you can add a bit more to correct it.  This is especially important if it has to wait for a little while because your husband isn’t home from work.

When it is nice and tender and soupy and DONE, stir in everything else: sauted veggies, parmesan (did I say I was a good vegetarian? No, I did not), salt and pepper to taste, and a bit more stock if necessary.

withveggiesPlate up with accoutrements.  And hell, it couldn’t hurt to put some toasted nuts on it after all.  Totally yum!  In your face, winter.  Risotto in the HOUSE.

finaldish